Most WordPress SEO articles start with “install this plugin.” This one does not. You can add meta keywords, write alt text, implement schema markup, and fix duplicate content entirely without a plugin — and this article shows you exactly how to do all of it, step by step. That said, there are specific situations where a plugin genuinely makes sense, and this article is honest about those, too. Whether you are a site owner who wants full control over your code or a developer building a lean WordPress setup, everything here is practical, verified, and ready to use. You do not always need a plugin. But you do need to know what you are doing.
What Are Meta Keywords In WordPress And Do They Still Matter?
Meta keywords are a specific type of HTML tag that is used to sit inside the head section of a webpage and tell search engines what topics the page covers. Back in the late 1990s and early 2000s, they were genuinely important. Search engines at the time relied heavily on what site owners declared in their meta name content attribute to decide what a page was about. That system worked until webmasters started abusing it by stuffing hundreds of unrelated keywords into the tag to manipulate rankings.
Google officially stopped using meta keywords as a ranking signal in 2009. Matt Cutts, who led Google’s webspam team at the time, confirmed this publicly on the Google Search Central blog. Since then, meta keywords have had zero impact on Google rankings. Bing followed a similar path, though Microsoft has stated it may use them as a spam signal rather than a positive ranking factor.
Here is where it gets interesting. Yandex, Russia’s largest search engine, and Naver, South Korea’s dominant search platform, still read meta keywords to some degree. If your site targets users in those markets, adding meta keywords is worth your time. Additionally, some internal site search systems — including certain WordPress search configurations and enterprise search tools — use the keywords meta tag to improve their own indexing. For everyone else building a Google-focused site in English, meta keywords will not move the needle one bit.
One thing that confuses almost every beginner is the difference between meta keywords and focus keywords. Meta keywords are an HTML tag in your page source that visitors never see. Focus keywords are the terms you are actively trying to rank for — the ones you weave into your headings, content, and title tags. Knowing that difference saves you from chasing the wrong thing.
What Is The SEO Title In WordPress, And How Is It Different From Your Page Title?
Imagine you publish a post and give it the heading “My Experience With WordPress Speed.” That heading is your H1, and it appears at the top of your page when someone visits it. Now open a new browser tab, search Google for your article, and look at what appears in the search results. That blue clickable text is your SEO title, also called the title tag. It lives in the HTML head section of your page, invisible to visitors but highly visible to search engines and to anyone browsing Google.
WordPress handles these two elements separately. Your H1 is controlled through the post editor. Your SEO title, when no plugin is active, is typically controlled by your theme. Some themes, like Astra and GeneratePress, output the post title as the title tag automatically. Others apply their own formatting, appending the site name or using a template you cannot easily change without editing theme files. This is a key reason why many people reach for Yoast SEO or Rank Math — not for meta keywords, but just to control what appears in Google’s SERP title display.
Google’s current guidance recommends keeping your SEO title between 50 and 60 characters. Anything longer and Google may rewrite it entirely, replacing your carefully crafted title with text pulled from somewhere else on the page. Google rewrites titles more often than most people realise — a 2021 study by Portent found Google rewrote title tags in roughly 61% of cases when they exceeded the recommended character limit. Keeping it tight and front-loading your primary keyword gives you the best chance of Google using exactly what you wrote.
The bottom line on SEO titles: your H1 and your title tag do not need to be identical. Google actually prefers a slight variation between them. Your H1 can be more descriptive and conversational. Your title tag should be tighter, keyword-focused, and under 60 characters.
How To Add Meta Keywords In WordPress Without A Plugin (Step By Step)
To add meta keywords in WordPress without a plugin, you have two methods available. Method 1 uses the functions.php file to enable keywords globally across all posts and pages. Method 2 uses WordPress Custom Fields to add keywords on a per-post basis. Both work. Which one suits you depends on how much control you need.
Method 1 — Using The Functions.php File (For All Pages Globally)
Before touching functions.php, create a child theme if you have not already. Editing the parent theme’s functions.php directly means every WordPress or theme update will wipe your changes. Go to Appearance > Themes, create a child theme, and make all edits there.
Once your child theme is active, go to Appearance > Theme File Editor. Select functions.php from the file list on the right side. Scroll to the bottom of the file and paste the following code:
php
add_action(‘wp_head’, function () {
if ( is_single() || is_page() ) {
$meta_keywords_raw = get_post_meta(get_the_ID(), ‘keywords’, true);
if ($meta_keywords_raw) {
$meta_keywords = preg_replace(‘/\s*,\s*/’, ‘, ‘, $meta_keywords_raw);
echo ‘<meta name=”keywords” content=”‘ . esc_attr($meta_keywords) . ‘”>’;
}
}
});
Here is what each part does in plain English. The wp_head action hook tells WordPress to run this code inside the HTML head section of every page. The is_single and is_page conditionals make sure it only fires on individual posts and pages, not on archives or the homepage. The get_post_meta function retrieves whatever keyword value you saved in the custom field named “keywords” for that specific post. The preg_replace function cleans up inconsistent spacing around commas so your output looks tidy. The final line outputs the actual meta tag into your HTML.
Save the file and verify that nothing broke by visiting your site. If the white screen of death appears, your code has a syntax error — go back and check for missing brackets or semicolons.
Method 2 — Using WordPress Custom Fields (Per Post Control)
This method gives you keyword control on a post-by-post basis, which is more precise than the global approach. Open any existing post in the Block Editor. Click the three-dot menu in the top right corner of the editor screen. Select Preferences from the dropdown. In the Preferences panel, click the Panels tab on the left side and scroll down to find the Custom Fields toggle. Switch it on. WordPress will ask you to reload the page — save your content first, then click Enable and Reload.
After the page reloads, scroll below the post editor, and you will see a new Custom Fields section. Click Enter New under the Name column. Type “keywords” exactly as written, all lowercase. In the Value column next to it, type your target keywords separated by commas. Click Add Custom Field to save.
To verify it is working, visit the post in your browser, then press Ctrl+U to open the page source code. Use Ctrl+F to search for “keywords” in the source. Your meta tag should appear inside the head section, looking exactly like this:
html
<meta name=”keywords” content=”your keyword, second keyword, third keyword”>
Which Method Should You Use?
Situation Best Method
Google-focused English language site: Neither — not needed
Yandex or Naver targeted content Custom Fields (per post)
Internal site search optimization Functions.php (global)
100+ pages needing individual control of Custom Fields
Developer building a lean theme Functions.php
If your entire site targets Google in English, save your energy. Neither method will improve your rankings. Spend that time on alt text and schema instead — both of which follow next.
Not sure what’s actually hurting your WordPress rankings?
I’ll check your site’s meta tags, schema, and on-page SEO in one free call.
No plugin required. No technical jargon. Just a clear answer on what your WordPress site needs to rank better on Google.
Get My Free On-Page SEO Review →How To Add Alt Text To Images In WordPress (3 Methods Explained)
Alt text, short for alternative text, is the written description you attach to an image in your HTML. It does two things that directly affect your site: it tells Google what the image contains (since Google cannot truly “see” images the way humans do), and it reads aloud to visually impaired users through screen readers. WCAG 2.1 compliance requires descriptive alt text on all non-decorative images. Getting this right is one of the fastest SEO wins available on any WordPress site.
Method 1 — Through The WordPress Media Library (Best For Bulk Updates)
Go to Media > Library in your WordPress dashboard. Click any image to open its Attachment Details panel on the right side. You will see four fields: Alt Text, Title, Caption, and Description. Alt Text is the only one Google uses as an image SEO signal. Click into the Alt Text field and write a description of what is physically in the image.
A common mistake here is copying the image filename directly into the alt text field. If your filename is “IMG_4832.jpg,” that tells Google nothing. Write what you actually see in the image. If it is a photo of a WordPress dashboard settings page, your alt text should say something like “WordPress Permalinks settings page showing Post Name option selected.”
Method 2 — Through The Block Editor While Writing (Best For New Content)
When you insert an image block into your post, click on the image itself. Look at the right sidebar panel — you will see a field labeled Alt Text directly below the image settings. Fill it in before you publish.
A point that confuses many writers: alt text, caption, and title are three different things. Alt text is for Google and screen readers — it never appears visually on the page. Caption appears below the image, visible to all readers. The title is a tooltip that appears when someone hovers over the image with a mouse. For SEO purposes, alt text is the only one that matters. Leave decorative images (dividers, background shapes, design elements) with empty alt text — Google expects this, and it aligns with WCAG 2.1 guidance on decorative content.
Method 3 — Editing The HTML Directly (For Developers)
In the Block Editor, click any image block and then click the three-dot options menu inside the block toolbar. Select Edit as HTML. You will see the raw image code. The alt attribute sits inside the img tag and looks like this:
html
<img src=”image-url.jpg” alt=”your descriptive text here” />
If the alt attribute is missing entirely, add it manually. If it contains an empty string (alt=””), Google treats the image as decorative. To bulk-check all images on your site for missing alt text without a plugin, open Chrome DevTools (F12), go to the Console tab, and run this command:
javascript
document.querySelectorAll(‘img:not([alt])’).length
This returns the number of images on that specific page with no alt attribute at all.
How To Write Alt Text That Actually Helps SEO
Describe the image content first, then include your target keyword naturally if it fits. Do not force keywords into every alt tag — Google’s image search guidelines specifically warn against keyword-stuffed alt text as it triggers spam signals.
Missing alt text across hundreds of images?
Let me audit your WordPress images and fix every missing alt text — done for you.
Image SEO is one of the fastest wins on any WordPress site. Book a free 10-minute call and I will tell you exactly how many images are hurting your rankings right now.
Fix My Image SEO for Free → I Just Have a Quick QuestionKeep alt text under 125 characters. That is the limit most screen readers use before cutting off the description mid-sentence.
A bad example: “wordpress seo wordpress plugin WordPress settings WordPress tutorial.”
A good example: “WordPress Theme Editor showing functions.php file open for editing.”
How To Add Schema Markup To WordPress Without A Plugin
What Schema Markup Actually Does (And Why It Matters More In 2026)
Schema markup is structured data you add to your page’s HTML that tells Google not just what your content says, but what it means. A recipe page without schema is just text. That same page with Recipe schema can appear in Google’s rich results with star ratings, cooking time, and calorie counts displayed directly in the search results — before anyone even clicks. In 2026, with Google’s AI Overviews pulling structured answers directly from pages, schema is more important than ever for appearing in those featured positions.
JSON-LD is the format Google prefers and the only format worth implementing manually. Unlike Microdata and RDFa, which require you to embed attributes throughout your existing HTML, JSON-LD is a self-contained script block you can drop anywhere in your page without touching your content structure. Google can read it, validate it, and use it independently of where it appears on the page.
Before writing any schema by hand, use a free generator. Merkle’s Schema Markup Generator and Schema.org’s own documentation are both reliable starting points. Generate your schema there, copy the output, then paste it into WordPress.
Method 1 — Adding Schema Via The WordPress Block Editor (No Code)
Open the post or page where you want to add schema. Click the plus icon to add a new block and search for Custom HTML. Select it. Paste your JSON-LD code inside the block. That is the entire process for a page-specific schema.
Here is a real JSON-LD example for a local business:
json
<script type=”application/ld+json”>
{
“@context”: “https://schema.org”,
“@type”: “LocalBusiness”,
“name”: “Corvit Systems Faisalabad”,
“address”: {
“@type”: “PostalAddress”,
“streetAddress”: “123 Main Street”,
“addressLocality”: “Faisalabad”,
“addressCountry”: “PK”
},
“telephone”: “+92-300-0000000”,
“openingHours”: “Mo-Fr 09:00-18:00”
}
</script>
Before you publish, paste your schema into Google’s Rich Results Test at search.google.com/test/rich-results. It will tell you whether the markup is valid and which rich result types it is eligible for.
Method 2 — Adding Schema To Your Theme’s Header File (Global Implementation)
Go to Appearance > Theme File Editor and open header.php. Find the closing head tag, which looks like this: </head>. Paste your JSON-LD script block directly above it. This places the schema on every page of your site globally, which works well for Organization schema or site-wide LocalBusiness markup.
Repeat the child theme warning here: any schema you add to the parent theme’s header.php will be overwritten the next time you update your theme. Do this in your child theme’s header.php only.
How To Add Service Schema Markup To A WordPress Website (Specific Guide)
Service schema is the most underused structured data type among local WordPress sites. If you run a business that offers specific services — legal, medical, home improvement, IT training — Service schema tells Google exactly what you offer, which directly supports visibility in “near me” searches and Google’s Local Map Pack results.
Here is the exact JSON-LD structure for a Service schema type:
json
<script type=”application/ld+json”>
{
“@context”: “https://schema.org”,
“@type”: “Service”,
“name”: “CCNA Training Course”,
“provider”: {
“@type”: “LocalBusiness”,
“name”: “Corvit Systems Faisalabad”
},
“serviceType”: “IT Training”,
“areaServed”: {
“@type”: “City”,
“name”: “Faisalabad”
},
“description”: “Professional CCNA certification training for beginners and IT professionals in Faisalabad, Pakistan.”,
“url”: “https://corvitfsd.com/ccna-course-in-faisalabad/”
}
</script>
Add this to your individual service pages using the Custom HTML block method. Customize the name, provider, serviceType, areaServed, and description fields for each service. After publishing, go to Google Search Console > Enhancements to verify that the schema was detected and whether any validation errors exist.
Want schema markup set up correctly on every page?
I’ll implement and validate schema markup on your WordPress site — no errors, no guesswork.
Service schema, LocalBusiness schema, FAQ schema — all implemented correctly and verified in Google Rich Results Test before we hand it back to you.
Set Up My Schema Markup →How To Get Rid Of Duplicate Content In WordPress (The Real Causes And Fixes)
Duplicate content on WordPress does not usually mean you accidentally published the same article twice. It means WordPress is quietly generating multiple URLs that contain identical or near-identical content — and Google has to decide which version to rank. Most of the time, Google makes a reasonable guess, but splitting ranking signals across multiple URLs means none of them rank as well as they should.
What Actually Creates Duplicate Content On WordPress Sites
Category archive pages display your full post content to every visitor who browses a category. If your post appears under two categories, it appears in two separate archive URLs. Tag archive pages do the same thing. Pagination creates versions like yoursite.com/page/2 and yoursite.com/page/3 that mirror your main blog index with slightly different post sets. Domain name variations mean yoursite.com and www.yoursite.com can both resolve as separate URLs unless you force a redirect. Print-friendly page plugins create an entirely separate printable version of every post, which Google can and does index separately.
Fix 1 — Set Canonical URLs Correctly Without A Plugin
A canonical tag is a line of HTML you place in your page’s head section that tells Google: “This is the official version of this page. Ignore all others.” Add this to your page source:
html
<link rel=”canonical” href=”https://yoursite.com/your-page-slug/” />
To add this without a plugin, open the post in the Block Editor. In the right sidebar, scroll down to find the Advanced section under the Post panel. WordPress 6.x includes a canonical URL field natively. Enter your preferred URL, and it will be output in the head section automatically.
Fix 2 — Noindex Archive And Tag Pages Without A Plugin
Add this code to your child theme’s functions.php to noindex tag archive pages:
php
add_action(‘wp_head’, function () {
if (is_tag() || is_category()) {
echo ‘<meta name=”robots” content=”noindex, follow”>’;
}
});
This tells Google not to index tag and category archive pages while still following the links on them — meaning Google can still discover and crawl your actual posts through those pages.
Fix 3 — Force A Single Domain Version via .htaccess
Open your site’s root htaccess file via your hosting file manager or FTP. Add this code to force all www traffic to non-www:
apache
RewriteEngine On
RewriteCond %{HTTP_HOST} ^www\.(.*)$ [NC]
RewriteRule ^(.*)$ https://%1/$1 [R=301,L]After saving, test it by typing www.yoursite.com into your browser and confirming it redirects to the non-www version. A 301 redirect passes full ranking signals to the canonical version.
Duplicate content silently draining your rankings?
Let’s find and fix every duplicate content issue on your WordPress site in one call.
Canonical tags, noindex fixes, domain redirects — a free 10-minute call will show you exactly which duplicate content problems are splitting your ranking signals right now.
Fix My Duplicate Content Issues → I Just Have a Quick QuestionWhen You Actually Do Need A Plugin (Being Honest About The Limits)
Manual implementation works well up to a point. Once your site passes 50 to 100 pages, managing schema markup, sitemaps, canonical tags, and noindex settings manually across every page becomes a maintenance burden that grows with every new post you publish. At that scale, one forgotten canonical tag or one incorrectly noindexed page can silently hurt your rankings for months.
Rank Math handles schema for every supported page type automatically, including Service, FAQ, Article, and Product schemas, with a visual interface that does not require you to touch JSON-LD code. Yoast SEO Premium includes a redirect manager, advanced canonical controls, and internal linking suggestions that genuinely save time at scale. Schema Pro is worth considering if schema is your primary need and you want a lighter plugin footprint than Rank Math or Yoast.
One thing you should always do manually, regardless of which plugin you choose: validate your schema in Google’s Rich Results Test after every significant page update. Plugins write schema automatically, but they can produce errors when your content structure changes, fields are left empty, or conflicting schema from different plugins fire on the same page.
Full WordPress On-Page SEO Implementation Checklist
Use this before publishing any page or post:
- Set SEO title to 50 to 60 characters with primary keyword near the front (reduces Google rewriting)
- Add descriptive alt text to every non-decorative image at upload time
- Insert JSON-LD schema markup on all service, product, and FAQ pages
- Validate all schema using Google Rich Results Test before hitting publish
- Set canonical URL on every page via the Block Editor Advanced panel
- Add meta keywords via custom fields only if targeting Yandex or internal search
- Noindex tag archive pages with fewer than 5 posts via functions.php
- Force single domain version (www or non-www) via htaccess with a 301 redirect
- Check Google Search Console Enhancements report 48 hours after publishing to confirm schema detection
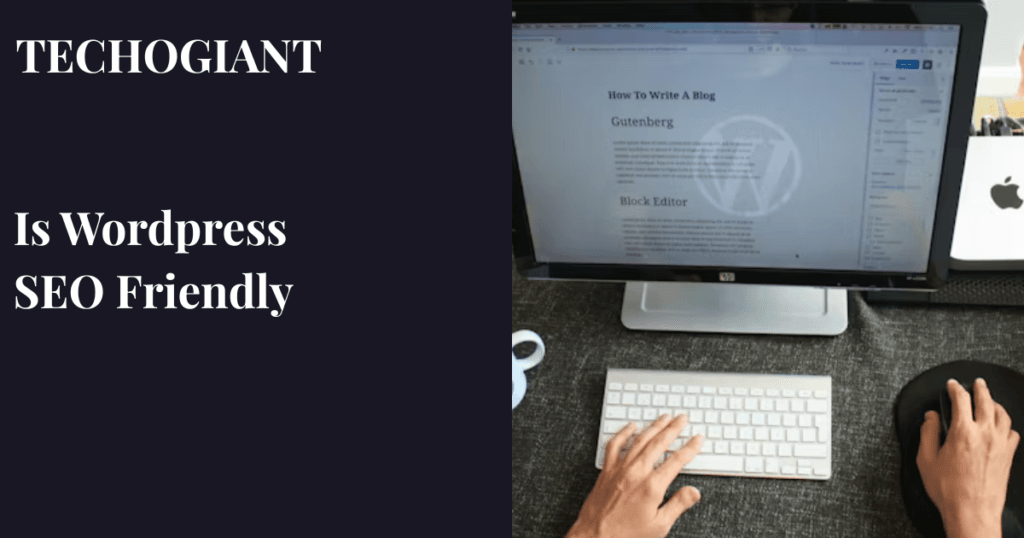
For a broader look at how WordPress handles SEO at the platform level — including Core Web Vitals, theme selection, and plugin ecosystem — see our full guide on whether WordPress is SEO friendly.
Do Meta Keywords Help WordPress SEO In 2026?
Not for Google. Google stopped reading meta keywords as a ranking signal in 2009 and has confirmed this multiple times through Google Search Central. For sites targeting Yandex (Russia), Naver (South Korea), or running internal site search systems that rely on meta tag data, adding meta keywords through WordPress custom fields is still worth doing. For everyone else focused on Google rankings, that time is better spent on schema markup and alt text.
What Is The Difference Between The SEO Title And The H1 In WordPress?
Your H1 is the main heading that appears on the page when visitors read your content. Your SEO title (title tag) is the text that appears in Google search results and in the browser tab — visitors never see it on the page itself. They should target the same keyword, but do not need to be word-for-word identical. Your title tag should be tighter (under 60 characters). Your H1 can be more descriptive and engaging.
Can I Add Alt Text To Images Already Uploaded To WordPress?
Yes. Go to Media > Library, click any image, and the Attachment Details panel opens on the right side. Click into the Alt Text field and type your description. Changes save immediately. You do not need to re-upload the image or update any posts where it is already used — the alt text updates everywhere that image appears across your site.
What Happens If I Add Schema Markup Incorrectly To WordPress?
Google ignores invalid schema rather than penalizing your site for it. You will not lose rankings from a malformed schema block. What you will lose is the rich result eligibility that a correct schema would have earned. Always validate using the Google Rich Results Test before publishing. If the test returns errors, fix them before the page goes live.
Does Duplicate Content On WordPress Actually Hurt Rankings?
Google rarely applies a manual penalty for duplicate content. What it does is consolidate ranking signals — if the same content exists at three different URLs, Google picks one to rank, and the others receive little to no traffic. Practically, this means weaker rankings across all versions compared to what a single properly canonicalized URL would achieve. Canonical tags and noindex on archive pages are the correct fixes, not panic.
How Do I Check If My Schema Markup Is Working In Google Search Console?
Open Google Search Console and look for the Enhancements section in the left navigation. Every schema type Google detects on your site appears there as its own report. Click any schema type to see which URLs have valid markup, which have warnings, and which have errors that are preventing rich result eligibility. Give it 48 to 72 hours after publishing before expecting the report to update.
Final Takeaway: You do not need a plugin to add meta keywords in WordPress, implement alt text, or set up schema markup. You need the right code, placed in the right location, validated before publishing. Start with alt text across your existing images — it is the fastest win on this list. Then add the Service schema to your key pages and validate it. Save the meta keywords step for last, and only bother if Yandex or internal search is part of your traffic strategy.